What Is the Best Way to Route Oil Cooler Hoses?

Time:2026-11-11 Author:Charlotte
0%

Oil cooler hoses do more than carry hot oil between the engine and cooler. Their route affects flow, heat exposure, vibration, and long-term reliability. A hose that looks tidy while the vehicle is parked may rub against a bracket once the engine moves. Small clearances matter.

How to route oil cooler hoses for optimal performance? Start with the vehicle manufacturer’s guidance and the hose maker’s bend-radius and temperature limits. Plan a smooth path away from exhaust parts, sharp edges, belts, and moving suspension or steering components. Keep enough slack for normal movement, but avoid loops that can snag or trap heat. Neat is not always safe.

This guide explains how to choose a practical route, position fittings, secure hoses, and check clearances before operation. It also covers common mistakes, such as twisting a hose during installation or tightening clamps against a vulnerable section. Use hoses and fittings rated for the application, and verify that connections match the system’s pressure requirements. Then inspect the installation for contact, kinks, and leaks, including after the first heat cycle. A visual check cannot reveal everything, and that is worth remembering. If the correct route remains unclear, consult the service manual or a qualified technician rather than forcing a tight fit.
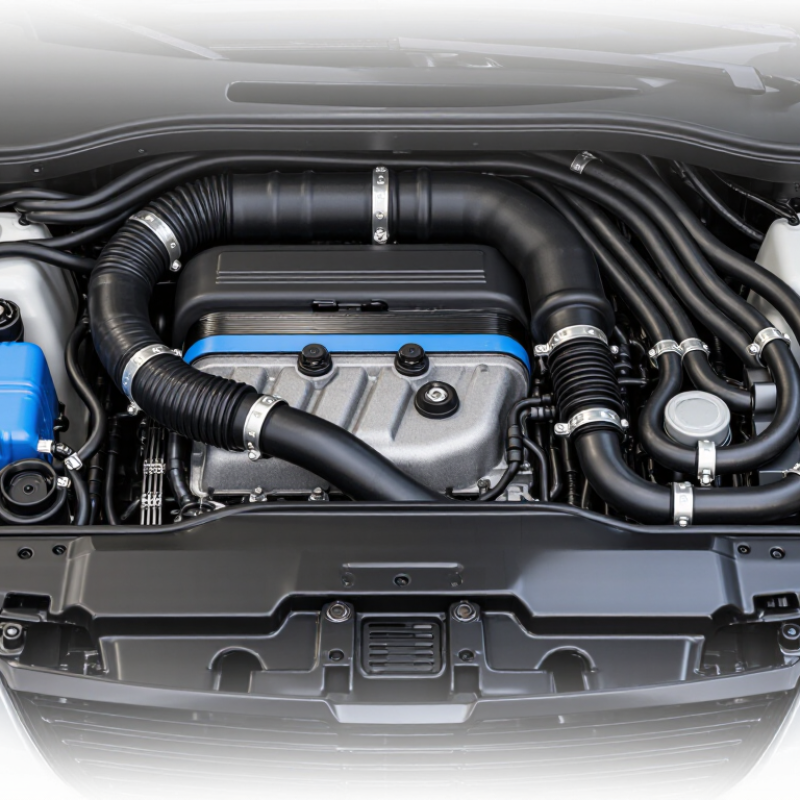
What Is the Best Way to Route Oil Cooler Hoses?

Oil Cooler Hose Routing: Components and Flow Direction

Oil cooler hose routing depends on the complete circuit, not just the cooler’s position. Hot oil usually leaves the engine through an adapter or filter housing, passes through a thermostatic valve, then enters the cooler. The cooled oil returns to the engine’s designated return port. Follow cast arrows or port labels; some coolers are not designed for reversed flow. Check the thermostat’s bypass path, too. A neat-looking hose layout can still send oil around the cooler when cold.

Use oil-rated hose and fittings sized for the system’s flow and pressure. Keep bends broad, support long runs, and avoid rubbing edges, moving parts, and exhaust heat. Leave enough slack for engine movement, but not a loop that can sag or trap against a hot surface. SAE J1532 covers automotive oil-cooler hose performance. ASTM D471 evaluates rubber changes after liquid exposure, including volume and hardness. These standards identify useful checks, but they do not determine the correct route for every vehicle. I would still verify the actual flow diagram; assumptions here are easy to get wrong.

Typical flow: Engine oil outlet → thermostat or bypass valve (if fitted) → cooler inlet → cooler outlet → engine oil return. Actual routing depends on the engine and cooling-system design; a thermostat may bypass the cooler when the oil is cold.

Planning a Route Away from Heat and Moving Parts

What Is the Best Way to Route Oil Cooler Hoses?

Plan the route before cutting or clamping anything. Keep hoses clear of exhaust manifolds, turbochargers, fans, belts, and steering links.

SAE J1532 sets transmission-oil-cooler hose performance requirements, including service temperatures up to 150°C. That figure is a hose limit, not a safe target for nearby exhaust heat. Heat keeps travelling. Check temperatures after a hard drive and again after shutdown, when heat can soak into nearby parts.

Follow the hose’s specified minimum bend radius, and avoid tight loops that flatten under vibration. Leave enough slack for engine movement, but not enough for the hose to rub a bracket or sag onto a hot surface. Use supports at sensible intervals, with soft edges and no crushing clamps.

Small gaps matter. A route that looks clear in the garage may shift when the engine rocks; recheck it after the first drive. This check is easy to skip.

Tips: Use a light and inspect the full route from both ends. Look for polished rub marks, softened covering, and fresh oil mist. Keep a safe gap from hot parts, and verify it through the vehicle maker’s service guidance; there is no universal clearance that suits every layout.

Choosing Hose Materials, Lengths, and Fittings

Oil cooler hose selection starts with fluid, temperature, and pressure ratings, not appearance. Choose hose explicitly rated for hot engine oil and the system’s operating pressure. Reinforced oil-cooler hose suits many installations, while braided assemblies may help where abrasion protection is needed. Check the manufacturer’s minimum bend radius. Small details matter.

Measure the route with the engine in its normal position, then allow for movement and thermal expansion. A hose should not pull tight when the engine shifts, but excess length can sag onto a belt or steering component. Keep it clear of exhaust heat, sharp edges, and pinch points. Secure it with cushioned clamps, leaving enough room for inspection. I have seen tidy-looking loops rub through over time; routing can look right at rest and still fail under movement.

Match fittings to the cooler and engine ports by thread, sealing method, and angle. Straight, 45-degree, or 90-degree ends can prevent awkward bends, but the wrong angle may create a worse route. Do not rely on thread feel alone: tapered threads, flare seats, and O-ring seals are not interchangeable. Not too tight. After installation, check that the hose is untwisted, fittings are supported, and connections stay dry during a careful leak inspection. A small adjustment may be needed.

Installing Hoses with Smooth Bends and Secure Supports

Good oil cooler hose routing starts with a clear path and gentle bends. Lay each hose along the intended route before tightening any fittings. A broad curve helps preserve flow and reduces stress at the connections. Kinks are a warning. Keep hoses away from sharp edges, steering parts, belts, and hot exhaust surfaces. Leave enough slack for engine movement, but not so much that a hose can sag or rub.

Check the route with the engine off and cool. Turn the steering through its full range if hoses pass near moving components. Secure the lines with suitable cushioned supports, spaced to prevent vibration and contact. Do not clamp them so tightly that the hose deforms. Support matters. Confirm that the hose and fittings are rated for the system’s temperature and pressure, and follow the equipment maker’s installation guidance.

After installation, inspect the bends and supports again. Start the engine and check for leaks from a safe position, then let the system cool before touching the hoses. Look for fresh rub marks, a flattened section, or a support that has shifted. A route that looks tidy while parked can tighten as the engine moves; that detail is easy to miss. If a bend feels forced, adjust the route rather than relying on a tighter clamp.

Inspecting Clearances and Checking for Leaks After Installation

A secure oil-cooler hose route needs a careful clearance check after installation. With the engine cold, follow each hose from fitting to fitting. Look for contact with sharp edges, belts, fans, exhaust parts, or body panels. Leave enough slack for normal engine movement, but avoid loops that can snag or rub. A route that looks tidy may still shift once the engine runs.

Check clearances again with the steering turned fully in both directions, where applicable. Inspect near suspension parts through their range of movement if the vehicle can be safely supported. Make sure clamps hold the hose without crushing it. Then start the engine and check for seepage around fittings as the system warms. Shut it off before touching or adjusting anything; hot oil can burn, and pressurized leaks can be hazardous. Follow the vehicle’s service instructions for pressure checks and fitting torque. I have seen a tiny rub mark become a leak later, so a quick visual check is not always enough.

Tips: Use a flashlight and a small mirror to inspect hidden areas. Recheck the hose after a short drive, once the engine has cooled. If a fitting stays damp, stop and investigate rather than simply tightening it harder.

FAQS

Which direction should oil cooler hoses follow?

Hot oil usually leaves the engine through an adapter or filter housing. It passes through a thermostatic valve, then enters the cooler. Cooled oil returns through the designated engine port. Follow the arrows or port labels; reversed flow may not suit every cooler.

Can oil bypass the cooler when the engine is cold?

Yes. A thermostat may route oil through a bypass path while cold. Check its flow diagram, not just the hose connections. A tidy layout can still miss this detail.

How can I keep hoses away from heat?

Route them clear of exhaust manifolds, turbochargers, and other hot parts. Inspect after driving and again after shutdown, when nearby parts may retain heat. No single clearance fits every vehicle.

How much slack should a hose have?

Leave enough slack for engine movement, but avoid loose loops. A sagging hose can touch a hot surface or rub a bracket. This balance is easy to misjudge.

What makes a hose bend acceptable?

Use broad curves and follow the hose’s minimum bend radius. Avoid tight bends that flatten or strain connections. Kinks are warning signs.

How should oil cooler hoses be supported?

Use suitable cushioned supports to limit vibration and contact. Place them at sensible intervals, with no sharp edges. Do not clamp tightly enough to deform the hose.

What should I check before starting the engine?

Confirm that hoses and fittings suit the system’s pressure and temperature. Check the full route with the engine cool. Turn the steering through its full range if hoses pass near moving parts.

What should I inspect after installation?

Start the engine and check for leaks from a safe position. After the system cools, look for fresh rub marks, softened covering, flattened sections, or shifted supports. Check again after driving. A parked inspection can miss movement.

Conclusion

Proper oil cooler hose routing begins with understanding the system’s components and the intended direction of oil flow, so the hoses connect correctly and support reliable circulation. A carefully planned route should keep hoses away from exhaust heat, sharp edges, and moving parts while allowing enough room for engine movement and maintenance. Selecting suitable hose materials, accurate lengths, and compatible fittings helps prevent premature wear and unwanted restrictions.

How to route oil cooler hoses for optimal performance? Use smooth, gradual bends rather than tight curves, and secure the hoses with appropriate supports to limit vibration and rubbing. Avoid stretching or twisting them during installation, and check that fittings are properly seated. Once installed, inspect clearances throughout the route and verify that hoses remain clear of nearby components. Start the system and check all connections for leaks, then recheck the routing and supports after operation to confirm they remain secure.

Charlotte

Charlotte

Charlotte is a seasoned marketing professional with a deep understanding of the company's portfolio and a passion for elevating its presence in the market. With a keen eye for detail and a commitment to excellence, she ensures that our professional blog is regularly updated with insightful articles......