Hose clamps and fittings rarely fail without warning. A loose clamp may leave a thin wet ring beneath a connection, while a damaged fitting can show rust, cracks, or unusual movement. These small signs often appear during routine maintenance, not during an obvious breakdown. Knowing how to notice them can protect equipment, reduce fluid loss, and prevent avoidable downtime.
How to inspect hose clamps and fittings regularly? Start with a clean, well-lit work area and inspect each connection by sight and touch. Look for corrosion, distorted bands, exposed threads, softened hose walls, and stains around fitting joints. Check whether the clamp sits squarely behind the hose barb, rather than biting into the rubber. A gentle hand check may reveal looseness, but excessive force can damage the hose or fitting. Use the manufacturer’s recommended torque when a specification is available.
Experience matters here. A clamp may appear tight while the hose underneath has hardened or split. I have also seen clean-looking fittings fail after vibration gradually weakened the joint. That is why a reliable inspection combines visual checks, careful movement, cleaning, and service records. The seven methods in this guide offer practical ways to identify wear before it becomes serious. They are not a substitute for manufacturer instructions or qualified maintenance advice. Some inspections may still miss hidden damage, and that limitation deserves attention. Small details matter. A dry surface today does not guarantee a secure connection tomorrow.
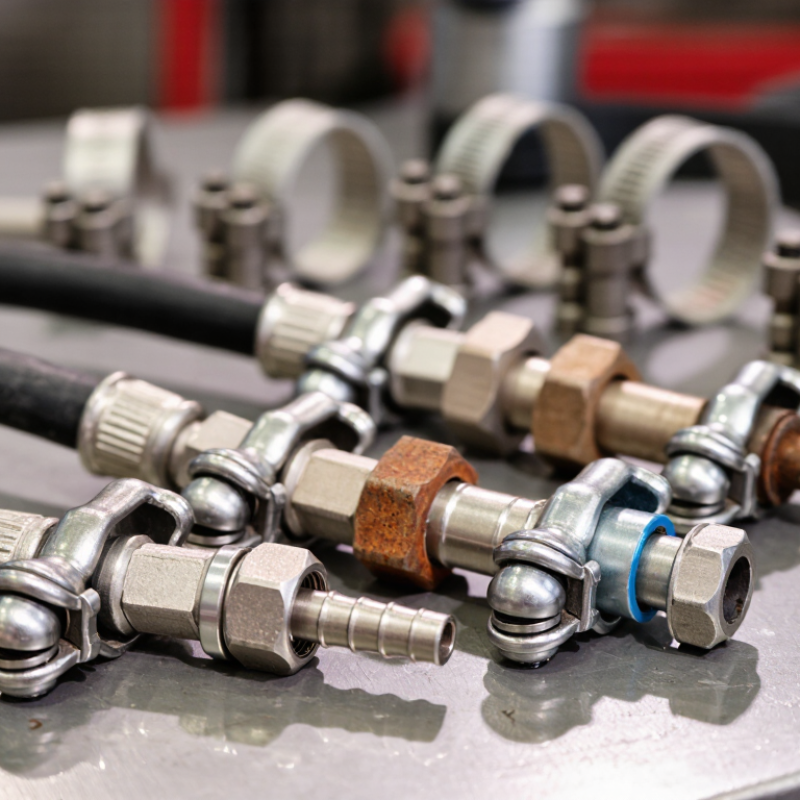
Hose Clamp and Fitting Types
Hose clamps and fittings are not interchangeable parts. Each type suits a different pressure, temperature, and movement pattern. Worm-drive clamps work well on flexible tubing and low to moderate pressure lines. T-bolt clamps provide stronger, more even compression for heavy-duty service. Spring clamps maintain tension during thermal expansion, but they can lose grip after repeated cycles. Ear clamps offer a compact seal, although removal usually damages the clamp.
Fittings need the same careful classification. Barbed fittings depend on hose elasticity and correct insertion depth. Compression fittings seal through a ferrule and require accurate tightening. Push-to-connect fittings save installation time, yet dirty tubing can cause small leaks. Threaded fittings may use tapered or parallel threads; confusing them is a common field error. Check the fitting material against the fluid, temperature, and vibration level. ISO 4413 emphasizes safe pneumatic design and controlled energy release. It also supports using components rated for the system’s actual conditions.
Inspect the joint with clean hands. Look for cuts, flattening, rust, or a clamp sitting behind the hose barb. A loose connection may leave a faint wet ring. Listen closely. The U.S. Department of Energy’s Compressed Air Sourcebook estimates leaks can waste 20–30% of compressor output. That figure makes a small hiss worth investigating. I have seen technicians tighten a damaged clamp and mistake resistance for security. That approach needs reconsideration. Replace distorted hardware, confirm alignment, and retest after the line reaches operating temperature.
| Inspection Method | Main Inspection Points | Applicable Clamp and Fitting Types | Acceptable Condition | Warning Signs | Recommended Action |
|---|---|---|---|---|---|
| 1 Visual Inspection | Check the clamp band, housing, bolt, fitting body, hose surface, and connection area for visible damage or contamination. | Worm-drive clamps T-bolt clamps Barbed fittings Threaded fittings | Components are correctly positioned, clean, intact, and free from cracks, deformation, sharp edges, and missing parts. | Rust, damaged threads, a bent band, cracked fitting, displaced clamp, or a hose that is not fully seated. | Stop using severely damaged parts. Clean minor surface contamination and replace defective clamps, fittings, or hoses. |
| 2 Leak Detection | Inspect for liquid, air, or gas leakage around the hose end, fitting interface, ferrule, seal, and threaded joint. | Compression fittings Flare fittings Push-to-connect fittings Hose-barb connections | No visible seepage, dripping, bubbles, pressure loss, or unusual odor is present during operation. | Wetness, residue trails, bubbles during a suitable leak test, hissing, pressure decline, or repeated fluid loss. | Depressurize the system before adjustment. Identify the leak source, then replace damaged seals or parts and reconnect according to the fitting instructions. |
| 3 Check Clamp Position | Verify that the clamp is located over the fitting’s sealing area and is not placed on the hose tip, behind the barb, or over a fitting shoulder incorrectly. | Worm-drive clamps Spring clamps Constant-tension clamps Ear clamps | The clamp sits squarely around the hose, remains fully supported by the fitting, and does not interfere with adjacent components. | The clamp is angled, too close to the hose end, positioned between barbs, or located where it can cut into the hose. | Release system pressure, reposition the clamp over the correct sealing zone, and verify that the hose remains fully engaged with the fitting. |
| 4 Assess Tightness and Torque | Check whether the clamp or fitting is secure without relying on excessive force. Use a calibrated torque tool when the assembly specifies a torque value. | Worm-drive clamps T-bolt clamps Compression fittings Threaded fittings | The connection is secure, the hose is not slipping, and the band or fitting has not distorted the hose or sealing surface. | The clamp can be moved by hand, the hose slips under load, the band is deeply embedded, or the fitting body is cracked or distorted. | Follow the component manufacturer’s specified tightening method and torque. Do not compensate for an incorrect size by overtightening. |
| 5 Inspect Hose and Seal Condition | Examine the hose for cuts, abrasion, hardening, softening, blistering, swelling, kinks, flattened sections, and chemical attack. Check O-rings and gaskets where used. | All clamp types O-ring fittings Push-to-connect fittings Flare fittings | The hose remains flexible and dimensionally stable, with an undamaged surface and properly seated, compatible seals. | Cracks, exposed reinforcement, permanent deformation, brittle or sticky rubber, damaged O-rings, or swelling near the connection. | Replace the hose or seal if damage affects pressure retention, material strength, or the sealing surface. Confirm chemical and temperature compatibility. |
| 6 Check Corrosion and Material Compatibility | Look for rust, pitting, galvanic corrosion, discoloration, and deterioration caused by the conveyed fluid, environment, or cleaning chemicals. | Stainless-steel clamps Carbon-steel clamps Brass fittings Plastic fittings | Materials are suitable for the fluid, temperature, pressure, humidity, and external environment, with no structural corrosion. | Deep pitting, flaking metal, seized adjustment hardware, cracked plastic, or corrosion concentrated between dissimilar metals. | Replace weakened parts with compatible materials. Review fluid compatibility and consider isolation methods where galvanic corrosion is possible. |
| 7 Verify Alignment, Support, and Operating Movement | Check that the hose is not under excessive bend, twist, pull, vibration, or side load, and that nearby supports prevent connection stress. | Spring clamps Constant-tension clamps Barbed fittings Flexible hose assemblies | The hose follows a smooth routing path, has adequate bend radius, and the fitting carries no unintended mechanical load. | Kinking, rubbing, hose movement, clamp fretting, fitting rotation, vibration marks, or repeated leakage after operation. | Correct the routing, add suitable supports, remove twist and side load, and recheck the connection after the system reaches operating conditions. |
Loose fittings often cause leaks before the hose visibly fails. A small wet ring matters. Check both ends before examining the hose middle.
Shut down the system and release all stored pressure. Stop first. Pressurized parts can move suddenly or spray fluid dangerously.
Look for cracks, bulges, abrasion, flattening, and shiny rubbing areas. A soft or unusually stiff hose also needs investigation. Visual checks cannot reveal every internal failure.
Inspect threads for crossing, corrosion, and damaged sealing surfaces. Check for exposed reinforcement near the socket. A loose connection may move when gently handled.
Look for rust, distortion, uneven gaps, and shifted positions. Adjust clamps evenly without excessive force. Over-tightening can crush the hose and create hidden leaks.
Replace clamps with slipping threads, lost tension, or severely reduced thickness. Replace fittings with damaged threads, oval openings, or deep scoring. Match replacement parts with pressure, temperature, hose material, and fluid compatibility.
Perform a dry inspection before testing under normal operating pressure. Never touch an active leak. Record the test pressure and inspect the joint again afterward.
Record hose position, fitting condition, visible wear, torque, and inspection date. Photograph each joint and mark clamp positions. Recheck after the first operating cycle.
Do not focus on one cracked hose and ignore hidden connections. I once missed a loose fitting behind a damaged hose. Use a mirror around brackets and warm equipment.
Regular inspection of hose clamps and fittings helps prevent leaks, pressure loss, equipment damage, and unexpected downtime. Begin by identifying the clamp and fitting types, since each design may require a different inspection approach. Before starting, shut down and isolate the system, release stored pressure, and gather suitable tools such as gloves, a flashlight, a wrench, and cleaning materials. Ask yourself: “How to inspect hose clamps and fittings regularly?” The answer begins with a consistent schedule and careful attention to visible and physical conditions.
Examine clamps for cracks, distortion, rust, looseness, and uneven tension, while checking that fasteners are secure without being over-tightened. Inspect hoses for cuts, hardening, bulges, abrasion, or signs of chemical deterioration. Fittings and connection points should be checked for corrosion, misalignment, seepage, and damaged threads. Clean away dirt so small defects are easier to see. After inspection, test the system gradually, adjust components when appropriate, and replace any clamp, fitting, or hose that remains damaged, unreliable, or unable to maintain a secure seal.

 TerraForge Machinery