Why Do Hoses Leak After Winter 7 Tips to Fix It?

Time:2026-09-16 Author:Liam
0%

Why do some hoses leak after winter? The answer often begins with water trapped inside the hose, faucet, or connector. When temperatures fall below freezing, that water expands and presses against rubber walls, threaded fittings, and valve seats. Damage may remain invisible until spring pressure returns. Then, a small crack can produce a steady spray near the coupling or a slow drip beneath the spigot.

The U.S. Environmental Protection Agency’s WaterSense program reports that household leaks can waste nearly 10,000 gallons of water annually. Its national estimate reaches nearly one trillion gallons each year. The Insurance Institute for Business & Home Safety also identifies frozen plumbing as a serious source of residential water damage. Plumbing expert Richard Trethewey offers a practical warning: “A hose bib is only as safe as the water left inside it.” That principle applies to ordinary garden hoses, too.

This guide explains seven repair steps, from removing damaged washers to testing connections under pressure. Look closely at brittle rubber, white stress marks, and swollen fittings. A hose can appear sound while hiding internal splitting. That is the uncomfortable part. Replacing one washer may not solve the problem. In some cases, the safest repair is a new hose, connector, or frost-resistant faucet. Check the source before patching the symptom. A few minutes with a towel and flashlight can reveal more than guesswork.
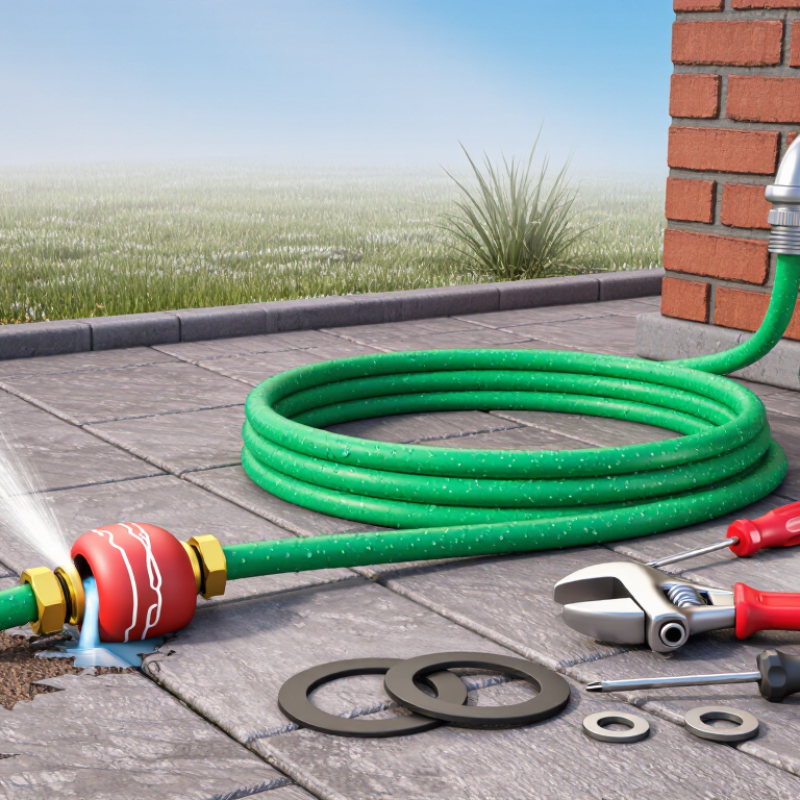
Why Do Hoses Leak After Winter 7 Tips to Fix It?

Why Hoses Leak After Winter

Why Hoses Leak After Winter

Winter often exposes weaknesses that stayed hidden during mild weather. Water trapped inside a hose can freeze, expand, and split the inner lining. Small cracks may only appear when spring water pressure returns. Cold temperatures can also harden rubber washers, leaving gaps around the connector. It is easy to blame the fitting, but the hose wall may be damaged too.

A careful repair starts with seven practical checks.

1 Turn off the water and inspect the hose under bright light.
2 Bend it gently and look for white marks, bubbles, or narrow cuts.
3 Replace flattened washers, then clean dirt from both connection threads.
4 Tighten fittings by hand before using only a small extra turn. Too much force can damage the seal.
5 If the end is cracked, cut it cleanly and install a suitable connector.
6 Test the hose slowly, not at full pressure.
7 Finally, drain it completely and store it away from freezing temperatures.

I once assumed a new washer would solve every leak. That was too simple. A hose with hidden frost damage may still spray from its middle after the connector is repaired. Do not patch a swollen section and trust it near high pressure. Replacement is safer when the inner tube feels soft, stiff, or uneven. After testing, run a dry cloth along the hose; a fresh wet streak can reveal a leak that is easy to miss.

How Freezing Temperatures Damage Hose Materials

Why Do Hoses Leak After Winter? 7 Tips to Fix It

Freezing temperatures can damage hose materials before any leak becomes visible. The U.S. Geological Survey reports that water expands by roughly 9% when it freezes. Trapped water can press against inner walls, seals, and threaded fittings. Repeated freeze-thaw cycles create tiny cracks in rubber, PVC, and reinforced layers. The damage may look harmless. It often appears only after normal water pressure returns.

ASTM D380 evaluates hose performance through pressure and burst testing, showing why hidden material weakness deserves attention.

During inspections, I have seen leaks begin at stiff bends and metal connectors. One detail I used to miss was the washer. Replace damaged washers, then inspect both ends for splits or bulges. Disconnect the hose before winter, drain it completely, and store it indoors or above freezing.

Do not use a flame or sudden high heat to thaw it. Warm the hose gradually, then run water at low pressure. Check for spray, swelling, or damp spots. If the hose still leaks, replace it rather than trusting a temporary patch.

Seven practical steps are simple: drain, disconnect, dry, inspect, replace seals, thaw gently, and pressure-test slowly.

A short test can prevent a soaked wall or slippery floor.

I should add one caution: a hose may pass a visual check and still contain internal cracks. That uncertainty is easy to underestimate.

How to Inspect a Hose for Winter-Related Leaks

Why Do Hoses Leak After Winter? 7 Tips to Fix It

How to Inspect a Hose for Winter-Related Leaks

Cold weather can trap water inside a hose, and frozen water expands against its inner wall. When temperatures rise, tiny splits may appear near fittings, bends, or flattened sections. Turn off the water supply before inspecting anything. Stretch the hose across a dry surface. Look for bulges, pale stress marks, loose couplings, and damp spots. Run a clean cloth along the hose. Moisture often reveals a pinhole before you can see it. I once missed a crack under a connector because I checked only the middle section.

Tip 1: Flex the hose gently. A winter-damaged area may feel unusually stiff or soft.

Tip 2: Check both washers inside the fittings. Brittle washers can leak even when the hose looks fine.

Tip 3: Pressurize the hose briefly and watch for spraying water. Keep your hands away from the leak during testing.

Tip 4: Mark each damaged point with tape. Several small leaks can hide along one frozen section.

Tip 5: Replace a split end rather than forcing a damaged connector.

Tip 6: Use a proper hose repair coupling for a clean cut. Tighten it firmly, but avoid crushing the hose.

Tip 7: If the outer cover is swollen or cracked in several places, replace the hose. Repairing it may be temporary.

Store hoses fully drained, loosely coiled, and protected from sharp freezing surfaces. I should have done that last year.

Seven Practical Ways to Repair or Replace a Leaking Hose

After winter, a hose may leak because frozen water expands inside it. Sunlight can also harden the outer layer and create small cracks. I inspect the hose only after it fully thaws. This prevents missed splits and inaccurate pressure testing.

Turn off the water and dry the hose completely. Trim away a short, damaged section with a clean utility knife. Join the remaining ends with a compatible connector and secure both clamps firmly. Replace loose or corroded clamps instead of forcing them tighter. A small puncture may accept waterproof repair tape as a temporary measure. However, tape often fails under high pressure. I once trusted a quick patch for too long, and the leak returned beside it.

For cracked fittings, remove the connector and install a matching replacement. Wrap threaded joints with suitable sealing tape, but keep tape away from the opening. If the hose feels stiff, blistered, or cracked in several places, replace the entire length. A new hose is safer than repeated repairs. Reopen the water slowly and check every joint with a dry cloth. Watch for fresh dampness after several minutes. Some leaks appear only when the hose bends. Store the repaired hose above freezing, without sharp folds, and inspect it again before heavy use.

Why Do Hoses Leak After Winter? 7 Tips to Fix It — Seven Practical Ways to Repair or Replace a Leaking Hose

Tip Likely Winter-Related Cause Common Signs What to Check Repair or Replacement Method Recommended Action Typical Time Useful Tools or Materials
1 Water froze inside the hose. Frozen water expands by approximately 9%, which can split the hose wall or damage a connector. Long cracks, bulges, a split near an end fitting, or leakage when the hose is pressurized. Inspect the entire length, especially low sections where water may have collected. Look for stretched or swollen areas. A cracked hose wall usually cannot be restored reliably with tape. Replace the damaged section or install a new hose. For a cuttable utility hose, remove the damaged portion and use compatible barbed fittings with clamps. Replace if the wall is split, brittle, or swollen. 15–45 minutes Replacement hose, utility knife, compatible fittings, hose clamps, screwdriver, and pliers.
2 Cold temperatures made the hose material stiff, allowing repeated bending or coiling to create stress cracks. Small surface cracks, seepage during bending, or a leak that appears only when water pressure rises. Bend the hose gently after it reaches room temperature. Do not sharply fold it while it is cold. Clean and dry a minor external pinhole, then use a hose-repair coupler designed for the hose type. Do not rely on adhesive tape for a pressurized or high-temperature line. Repair a small, isolated cut; replace a hose with multiple cracks. 20–40 minutes Correct-size repair coupler, two clamps, hose cutter, mild soap, and clean water.
3 Seals, washers, or O-rings contracted or hardened during cold storage and no longer formed a watertight connection. Water drips from the faucet connection, threaded joint, quick connector, or coupling rather than from the hose wall. Dry the joint, turn on the water briefly, and identify the exact point where the first drop appears. Shut off the water, remove the connection, clean the sealing surfaces, and install a correctly sized replacement washer or O-ring. Tighten by hand, then add only a small amount of extra torque if needed. Repair by replacing the seal; avoid overtightening plastic fittings. 10–20 minutes Correct washer or O-ring, adjustable pliers, cloth, and a small brush.
4 Metal or plastic fittings were stressed by freezing, impact, corrosion, or repeated temperature changes. Cracked connector, distorted threads, rust around a joint, or leakage that continues after a new washer is installed. Check both sides of every coupling and examine threads for cross-threading, cracks, and corrosion. Replace the damaged fitting with one made for the hose diameter, connection type, pressure, and intended fluid. Do not force mismatched threads together. Replace the fitting if it is cracked, deformed, or severely corroded. 20–60 minutes Matching connector, hose clamps, adjustable wrench, thread sealant where appropriate, and a deburring tool.
5 The hose was stored with residual water, sharp bends, weight on top of it, or exposure to freezing conditions. Flat spots, permanent kinks, abrasion marks, flattened flow, or a leak at a bend or storage point. Lay the hose straight and inspect areas that were tightly coiled or pressed against a sharp edge. Trim a clean, undamaged hose end and reconnect it with a compatible fitting if the defect is limited to the end. Replace the hose if the kink has become permanent or the reinforcement is visible. Repair an isolated end defect; replace structural damage. 15–35 minutes Hose cutter, compatible splice or end fitting, clamps, and a smooth storage reel or hanger.
6 Winter storage or road salt caused abrasion, contamination, or corrosion at contact points and connections. Worn outer cover, exposed reinforcement, salty residue, green or white deposits, or a slow leak near a clamp. Wash the hose and fittings with clean water, dry them fully, and inspect places that rub against concrete, metal, or vehicle parts. Replace a hose with exposed reinforcement or deep abrasion. If only a removable clamp is corroded, install a new corrosion-resistant clamp after cleaning the connection. Replace if reinforcement is exposed; otherwise repair the clamp or connection. 20–45 minutes Clean water, soft brush, replacement clamp, hose cutter, and protective sleeve or edge guard.
7 Pressure surged when a valve was opened quickly, or the hose was used beyond its rated pressure, temperature, or fluid compatibility. Leak appears only at high flow, the hose balloons, fittings blow off, or the outer layer becomes soft, cracked, or swollen. Check the hose markings or product specifications for pressure, temperature, diameter, and fluid compatibility. Inspect for bulges and soft spots. Depressurize the system before removal. Replace the hose with one rated for the actual service conditions and secure it with the correct fittings. Open valves gradually during testing. Replace any hose that has ballooned, softened, or been used outside its rating. 20–60 minutes Correctly rated replacement hose, compatible fittings, suitable clamps, gloves, and eye protection.

How to Prevent Hose Leaks Before the Next Winter

Why Do Hoses Leak After Winter? 7 Tips to Fix It

How to Prevent Hose Leaks Before the Next Winter

Freezing water expands inside hose walls, fittings, and washers. Even a small split can open when pressure returns in spring. The U.S. Environmental Protection Agency’s WaterSense program reports that household leaks waste nearly 10,000 gallons of water yearly. About 10% of homes lose at least 90 gallons daily. Those figures include many unnoticed connections. The Insurance Information Institute, citing ISO claims data from 2017–2021, reports that water damage and freezing represented 29.7% of homeowners’ claims. A stiff hose is not always harmless.

Before temperatures fall, disconnect every outdoor hose, open the faucet, and let trapped water drain. Coil it loosely, without sharp bends, then store it indoors and above the floor. Inspect both ends for swollen washers, rust, or hairline cracks. Replace damaged washers before reconnecting anything. Shut off the indoor supply valve when possible, and drain the exterior line completely. Add approved insulation around exposed faucet fittings, but never cover a wet connection. Keep hoses away from heaters, sunlight, and chemicals during storage. In spring, restore pressure slowly and check each joint with a dry cloth. It takes seconds.

A useful admission: visual checks can miss internal damage. If a hose feels unusually rigid, soft, or blistered, replacement is safer than a temporary patch. EPA WaterSense also recommends repairing leaks promptly, because a slow drip can become expensive when freezing repeats the damage.

FAQS

Why do hoses often leak after winter?

Water trapped inside can freeze and expand by roughly 9%. This pressure may split the inner lining. The cracks may stay hidden until spring water pressure returns.

Which hose areas need the closest inspection?

Check bends, fittings, flattened sections, and both ends. Look for bulges, pale marks, narrow cuts, or damp spots. Inspect the middle too.

How can I find a tiny hose leak?

Turn off the water and place the hose on a dry surface. Run a clean cloth along its length. A fresh wet streak may reveal a pinhole. Briefly test it at low pressure.

Can a new washer fix every winter leak?

No. A brittle washer can cause connector leaks, but frost may also damage the hose wall. I once blamed the washer too quickly. The middle still sprayed afterward.

How should damaged hose fittings be repaired?

Replace split ends with a suitable repair coupling. Make a clean, straight cut first. Tighten by hand, then add only a small turn. Excess force can crush the seal.

When should a winter-damaged hose be replaced?

Replace it when the cover is swollen, cracked repeatedly, or uneven. Replacement is safer when the inner tube feels soft or stiff. Do not trust a weak hose under high pressure.

How should a frozen hose be thawed safely?

Warm it gradually at room temperature. Do not use flames or sudden high heat. After thawing, run water slowly and watch for spraying, swelling, or damp patches.

How can I prevent leaks next winter?

Disconnect the hose, drain it completely, and dry both ends. Store it loosely coiled above freezing. Avoid sharp frozen surfaces. I should have done that last year.

Conclusion

Why do some hoses leak after winter? Freezing temperatures can leave hoses damaged even when the cracks are not immediately visible. Water trapped inside expands as it freezes, creating pressure that may split the hose wall, weaken its connections, or deform seals and fittings. Repeated freezing and thawing can also make rubber and plastic stiff, brittle, and more likely to leak when the hose is used again.

A careful inspection should look for bulges, surface cracks, soft spots, damaged ends, and dripping around connectors. Minor leaks may be corrected by trimming a damaged section, replacing a washer, tightening a fitting, or installing a suitable connector. If the hose is brittle, severely cracked, or leaking in several places, replacing it is safer and more practical. Before the next winter, drain all water, disconnect the hose, store it in a dry sheltered place, avoid sharp bends, and protect fittings from freezing temperatures. These simple steps can extend hose life and reduce unexpected leaks.

Liam

Liam

Liam is a dedicated marketing professional with a profound expertise in the industry, where he excels at highlighting the unique advantages of our core products. With a keen understanding of market trends and consumer needs, Liam frequently updates our company’s professional blog, providing......